RESIDUAL STRESS MEASUREMENT
CONTOUR METHOD
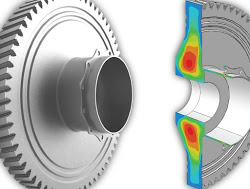
With the contour method, a high-resolution 2-D map of the residual stress can be determined by conducting a cut at the plane of interest. With a single residual stress measurement the method can map the stress component acting normal to a cut surface. In addition, multiple components of the residual stress tensor can be measured by performing additional contour cuts (see an example) or alternatively, by applying other residual stress measurement techniques (such as X-ray diffraction or incremental centre hole drilling) on the newly created cut surface.
Such versatility enables the identification of the weakest links in solid structures, the optimisation of material processing routes as well as conducting more accurate lifing and structural integrity assessment.
The contour method enables residual stress measurements in most conductive materials of virtually any geometry and performs well with a range of part thicknesses from 2 up to 600 mm, while other sample dimensions can be even larger.
We pride ourselves for being the UK centre of excellence for residual stress measurement using the contour method. StressMap’s experience with the method over the past 13 years has resulted in significant improvements on the technique and a number of academic publications. See some selected examples in our projects section. Click here to see selected residual stress examples in our projects page.
Learn more
NEUTRON DIFFRACTION
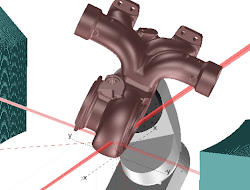 Residual stress measurement with neutron diffraction can provides a 3-D map of the full residual stress tensor with a good resolution, in many cases, non-destructively. To perform this technique, we have access to central nuclear facilities, such as the STFC Rutherford Appleton Laboratory.
With neutron diffraction, any poly-crystalline material can be measured, but it works best in solids with small grains and with minimal texture.
The structure of interest should be at least a few mm in size and weigh no more than 1 tonne. The penetration of neutron beams varies from one material to another. Typical achievable measurement depths are ~40 mm in steels, ~20 mm in nickel, ~50 mm in aluminium. Where deeper measurements are required, we can also combine neutron diffraction with the contour method.
StressMap staff have extensive experience in conducting neutron diffraction measurements for safety-critical applications (e.g. aerospace, power and nuclear). We also draw from the expertise of globally renowned researchers from the Materials Engineering Group at The Open University, which had a leading role in the development of the neutron scattering instrument at ENGIN-X, ensuring highly reliable results even in the most challenging structures. In addition, The Open University developed SSCANSS, a neutron diffraction experiment simulator that is used in three neutron diffraction facilities worldwide.
X-RAY DIFFRACTION
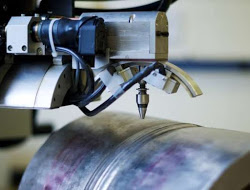 Residual stress measurement by x-ray diffraction (XRD) allows a multitude of points to be non-destructively measured on a solid surface. The method is particularly suitable for determining the near-surface in-plane residual stress state. In general, the measurement depth is in the order of a few micrometres. Depth profiles can be determined by removing thin layers of material from the surface and measuring the stresses at different depths. Where deeper measurements are required, the technique can also be combined with the contour method.
With XRD, any poly-crystalline material can be measured, but it works best in solids with small grains and with minimal texture. The structure of interest should be at least 0.5 mm thick with a 0.8 × 0.8 mm² surface – with our portable measurement system, we can measure structures of any size above that.
We have extensive experience in conducting X-ray diffraction measurements for safety-critical applications (e.g. aerospace and nuclear). Our highly trained staff can perform measurements in-house or at the client’s site. We also draw from the expertise of globally renowned researchers from the Materials Engineering Group at the Open University to ensure highly reliable results even in the most complex structures.
At StressMap, we perform XRD measurements according to residual stress standards and good practice guides.
INCREMENTAL CENTRE HOLE DRILLING
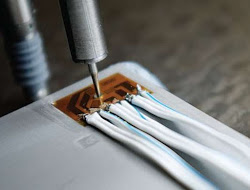 With incremental centre hole drilling (ICHD), a depth profile of the residual stresses can be determined by incrementally and carefully drilling a small hole on the surface of interest and monitoring the relaxation strains. The method is particularly suitable for determining the near-surface in-plane residual stress state. It can be combined with the contour method to determine residual stresses deep within solid structures.
The technique works for any machinable material with virtually any geometry, as long as it is at least 0.5 mm thick.
We have extensive experience in conducting ICHD for safety critical applications (e.g. aerospace). Our highly trained staff can perform measurements in-house or at the client’s site. Working in partnership with StressCraft we can offer unmatched capabilities.
At StressMap, we follow residual stress standards and good practice guides in all our incremental hole drilling measurements.
SYNCHROTRON DIFFRACTION
 With synchrotron diffraction, a 3-D map of the full residual stress tensor can be measured with a very high resolution (down to 50 µm), in many cases, non-destructively. To perform this technique, we have access to central nuclear facilities, such as the STFC Rutherford Appleton Laboratory.
With synchrotron diffraction, any poly-crystalline material can be measured, but it works best in solids with very fine grains and with minimal texture. The structure of interest should be at least 0.1 mm in all directions and weigh no more than 1 tonne.
The penetration of synchrotron X-ray beams varies from one material to another. Typical achievable measurement depths are ~25 mm in steels and ~60 mm in aluminium. Where deeper measurements are required, we can also combine synchrotron diffraction with the contour method.
Our team has extensive experience in conducting synchrotron diffraction measurements for safety-critical applications (e.g. aerospace and nuclear). We also draw from the expertise of globally renowned researchers from the Materials Engineering Group at the Open University, ensuring highly reliable results even in the most complex geometries.


